



Roof rail dent repair with PDR starts with one question: can a tool reach the back of the metal? On the open roof edge it usually can, through the headliner, a dome light or a sunroof. On the boxed rail itself and on most C-pillars it usually cannot, and the dent is glue pulled from the outside, then finished with a knockdown. The technician who decides the route first saves the most time. This guide maps the hard-to-reach zones of a car, shows which route and which tool fit each one, and explains how to set glue tabs along a rail without pulling the body line out of shape.
Key takeaways
- A roof rail is a closed, double-wall box. The inner edge of the roof skin can often be reached from inside; the rail section itself usually cannot.
- Check the easy routes before the headliner comes down: sunroof, dome light, third brake light, tail light opening, quarter trim.
- Whale tails are the push tool for braced and double-wall zones: one edge kicks off the brace, the flat blade spreads the push across the low spot.
- Where no tool can reach, glue pull. On a rail, use small or crease tabs set along the line, pull in light stages and knock down the highs after every pull.
- Curtain airbags and their wiring run along the roof rail in many modern cars. Never pry or push near them; follow the vehicle's service information.
Why roof rails and C-pillars are the hardest dents on a car
Roof rails and C-pillars are hard because the metal is closed off from behind: the rail is a box section welded to the roof skin, and the pillar is a structural member with a second skin, trim and often an airbag in front of it.
On a door or a hood, the back of the panel is open space with a few braces. On the rail, the outer skin is folded over an inner reinforcement, so there is metal behind the metal. A rod that goes in through the headliner area meets the inner wall, not the back of the dent. The C-pillar (the sail panel between the rear door and the rear glass on a sedan) adds a second problem: it is a styling surface with a strong body line, so any high spot shows in the reflection from across the car park.
That is why trade guides describe the rail as the area where headliner removal often gives no access at all and glue pulling becomes the main repair. Hail makes it worse: a hailstorm that peppers the roof leaves a row of dents along the rail too. Our hail roof workflow covers the open part of the roof; this guide picks up where that one ends.
Map the zone before you choose a tool
Every hard-to-reach dent falls into one of four zones, and each zone has a first-choice route.
| Zone | What is behind the skin | First route to try | Typical tool |
|---|---|---|---|
| Roof edge, inside the rail | Open roof cavity, roof bows, headliner | Sunroof, dome light, then headliner drop | Long rod or whale tail, roof hanger for leverage |
| Roof rail (the box section) | Inner reinforcement, airbag, wiring | Glue pull from outside | Small and crease tabs, light puller, knockdown |
| C-pillar / sail panel | Pillar reinforcement, trim, sometimes an airbag | Tail light or quarter trim opening; else glue pull | Question-mark whale tail, long thin tool, tabs |
| Upper quarter panel below the pillar | Inner wheelhouse, trunk side trim | Tail light opening, trunk trim | Whale tail, hook, long single-bend rod |
The table is a starting point, not a rule: two cars of the same size can have completely different inner structures. Look at the car from inside first. A torch through the tail light opening or behind the trunk trim tells you in a minute whether a tool can reach the back of the dent.
Access routes: try the easy ones first
The headliner is the last route, not the first. Most roof edge dents can be reached through an opening that takes minutes to clear.
- Sunroof. With the glass open, a window guard and wedge give a path to the centre and rear of the roof.
- Dome light or overhead console. Removing the light opens a hole in the headliner directly under the roof skin.
- Third brake light. On many trucks and SUVs it reaches the back edge of the roof and is held by a few screws.
- Tail light opening. On many sedans and small SUVs a long, thin tool goes up through the tail light hole into the sail panel and the lower C-pillar, a route described in this technician's access guide.
- Headliner drop. When nothing else reaches, the headliner comes down: visors, grab handles, pillar trims, dome light. Note every screw and where it came from; a screw that is too long, put back in the wrong hole, can dent the roof from the inside.
Before any trim on the pillars or the rail comes off, check the vehicle's service information for the curtain airbags. They sit along the roof rail in many modern cars, and their inflators and wiring are not something to pry against, push past or unplug without the right procedure.
Whale tails for braced and double-wall zones
When a tool can get near the dent but a round rod cannot get under it, the whale tail is the push tool: its flat blade fits between a brace and the skin, one edge kicks off the brace and the face lifts the low spot.
That geometry is what makes it work on the inner roof edge and on the C-pillar. A round tip puts all the force on one point, so in a tight space it tends to slip and leave a pick mark. A whale tail spreads the push over its width and can be rotated against the brace like a lever. The width matters: a wide tip lifts a soft dent evenly, a narrow tip fits a tighter gap.
For the pillar and the inner rail, the shape of the shaft matters as much as the tip. A question-mark curve lets the blade come around a reinforcement and arrive flat under the skin, where a straight whale tail would hit the inner wall first. Work it the way you work any rod: small rotations, then check the reflection, then the next move. A whale tail that is pushed hard leaves marks faster than any other tool in the cart.
On the roof, leverage is the other half of the job. Reaching across a roof from the door opening is tiring, and a tired arm pushes unevenly. A roof hanger or strap clamped in the door frame gives the rod a fixed pivot, so the push comes from a controlled lever instead of your shoulder.
Roof rail dent repair with glue: how to set the tabs
When the back of the rail cannot be reached, the dent is pulled from the outside with glue tabs, in several light stages, with knockdown work after each pull.
- Clean and warm the panel. Wipe the area with isopropyl alcohol so the glue bonds to clean paint. In a cold bay, warm the panel slightly; match the glue to the temperature.
- Choose the tab by the dent, not by habit. A round ding on the rail takes a small round tab. A dent that runs along the rail or sits on the body line takes a narrow crease tab laid along the line, so the pull follows the rail instead of lifting a round bump into it.
- Start at the edges of a long dent. On a long dent along the rail, set tabs on the shallow ends first and work toward the deepest point, the way you would release a crease.
- Pull light. A mini lifter or a slide hammer with gentle hits brings the metal up in steps. One heavy pull on a rail almost always overshoots and leaves a high spot on the line.
- Knock down, read, repeat. Release the tab with alcohol, tap the high spots down with a knockdown and a light hammer, read the reflection, and set the next tab.
Our step-by-step guide on how to glue pull a dent covers glue, temperature and pullers in detail.
Finishing the body line
A rail or pillar dent is finished when the body line is straight in the reflection from both sides, not when the dent is gone under a fingertip.
Hold a line board or a PDR light low along the rail and read it from the front and the rear of the car. The line should run without a wave where the dent was. A small high spot on the line is tapped down with a fine knockdown pen; a small remaining low is lifted with one more light pull or, if a tool now reaches, one small push. Our guide on reading a dent with a line board and a light explains the reflection work.
Tools for roof rail and C-pillar dents
Three tools cover the push, the leverage and the pull on these zones:
- Reach around the reinforcement. The Split Edition 4-Piece Question Mark Whale Tail PDR Set has a question-mark curve and a 35 mm whale tail head, in 10, 45, 65 and 85 cm, with an AISI 630 stainless option. It is made for double-wall panels and tight bracing.
- Leverage on the roof. The 5-Level Adjustable PDR Load Strap Roof Hanger clamps in the door jamb and gives the rod a fixed pivot point for roof work.
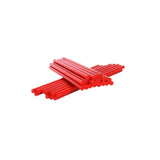
- Pull along the line. The PDR Blue Rigid Flat Crease Glue Tabs (22.5 mm) are flat, rigid crease tabs with an L-arm adapter, made for shallow creases and linear dents like a dent along the rail.
DentPDR tools are made in our own facility, with a 1-year warranty and a 30-day free exchange.
FAQ
Can a roof rail dent be fixed with paintless dent repair?
Yes, in most cases, as long as the paint is not cracked. The rail is a closed box section, so the dent usually cannot be pushed from behind. It is glue pulled from the outside with small or crease tabs, in light stages, and the highs are knocked down after each pull until the body line reads straight.
Do you have to remove the headliner to fix a roof dent?
Not always. Check the sunroof, the dome light and, on trucks, the third brake light first. The headliner comes down when the dent is on the open roof and none of those openings reaches it. For a dent on the rail itself, dropping the headliner often gives no access, and glue pulling is the better route.
How do you fix a dent on a C-pillar?
Look for an inside route first: on many sedans and small SUVs a long, thin tool reaches the pillar through the tail light opening or the quarter trim. A question-mark whale tail can come around the reinforcement. If no tool reaches, the pillar dent is glue pulled and finished with a knockdown, with extra care on the body line.
What is a whale tail tool used for in PDR?
A whale tail is a flat-bladed PDR tool for braced and tight zones. One edge kicks off a brace or inner panel and the flat face lifts the dent, spreading the push across its width. It reaches places a round rod cannot get under, but it marks the panel quickly if it is pushed hard.
Is it safe to work near the curtain airbags?
Only with care and the vehicle's service information. Curtain airbags run along the roof rail in many modern cars. Do not pry against them, push tools past them or unplug them without the manufacturer's procedure. When in doubt, choose the outside route and glue pull.
Working a lot of roofs and pillars? Pair a question-mark whale tail with a roof hanger and a set of crease tabs, and most rail and pillar dents have a route.


